Getting Started Tutorial
This tutorial will walk you through using Knowii Voice AI for the first time.
Prerequisites
- Knowii Voice AI installed on your computer
- A working microphone
- Completed the first-time setup wizard
If you haven't installed Knowii Voice AI yet, see the Installation Guide.
Step 1: Launch Knowii Voice AI
After installation, Knowii Voice AI starts with the main window visible (default behavior):
- On first launch, the app displays the first-time setup wizard
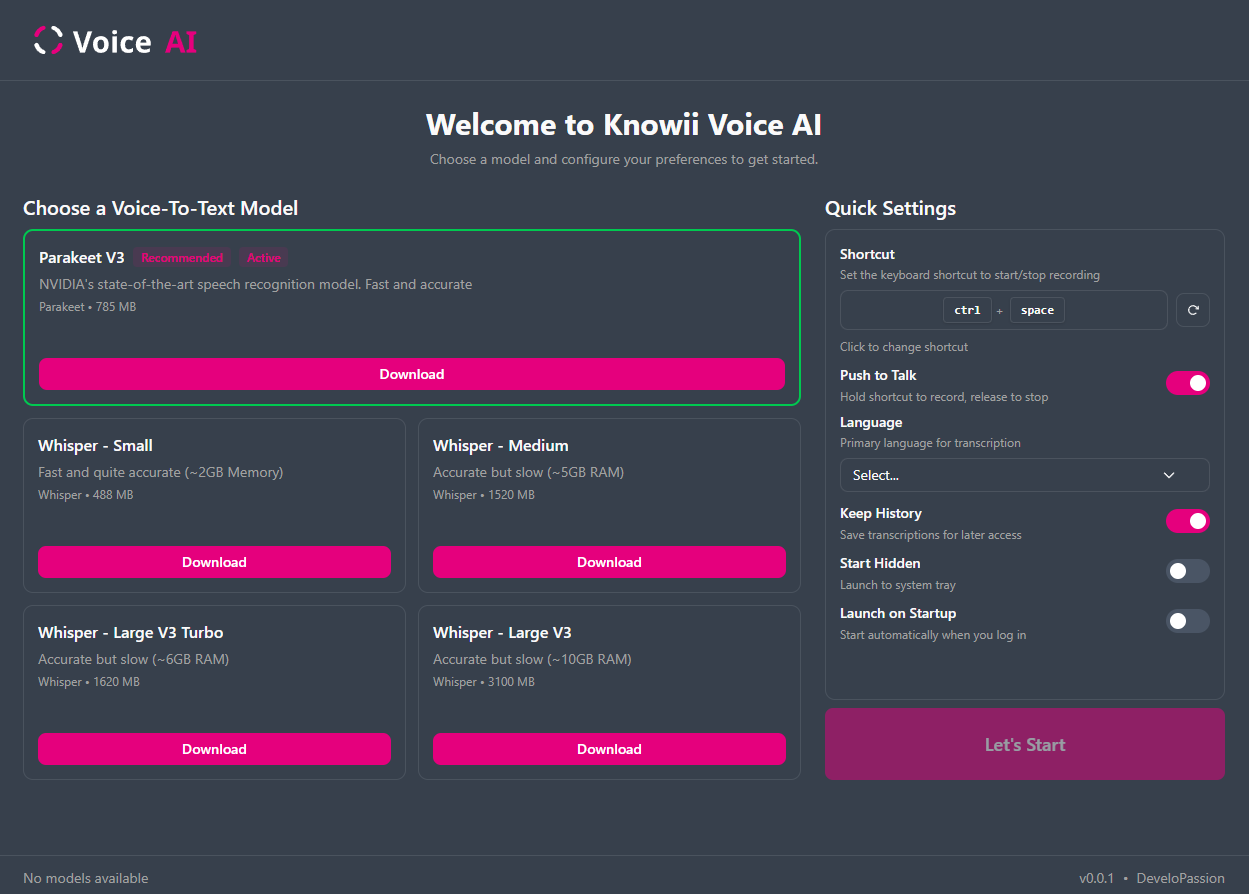
- The wizard will guide you through downloading your first AI model - this is required before you can use the app
- When choosing a model, select the one with the "Recommended" tag
- Once the model has finished downloading, it will automatically be activated for you
- Customize the Quick Settings if you want/need, then click on "Let's Start"
- A system tray icon also appears near the clock (taskbar notification area)
- Right-click the system tray icon for quick access to common actions
Here's what the main interface looks like:
Tip: You can close the main window at any time; the app continues running in the background and remains fully functional.
Step 2: Your First Recording
Now let's record and transcribe your first text!
- Open any text application (e.g., Notepad, Word, email, browser)
- Click in a text field to place your cursor
- Press and hold
Ctrl+Space(default shortcut) - The recording overlay will appear on screen and you will hear a sound indicating that recording has started
![]()
- Wait for the sound notification to finish
- Speak clearly: "This is my first transcription with AI"
- Release the shortcut key when done speaking
- Watch as your text appears automatically!
Step 3: Explore History
Let's view your transcription history:
- Open the settings (right click on the tray icon and select "Settings...")

- Go to the History tab
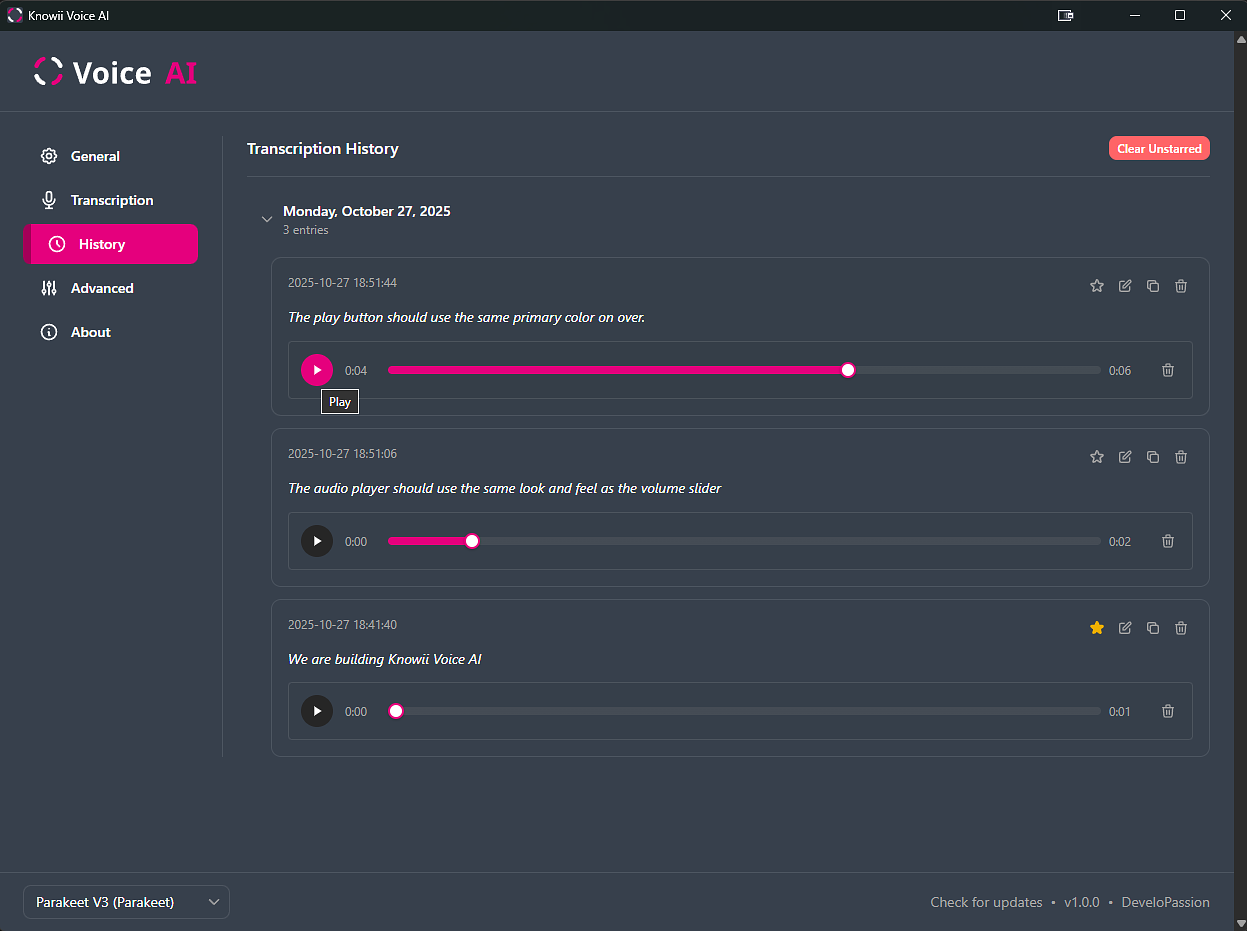
- You'll see your first transcription listed
- Try double-clicking it to copy to clipboard
- Try starring it by clicking the star icon
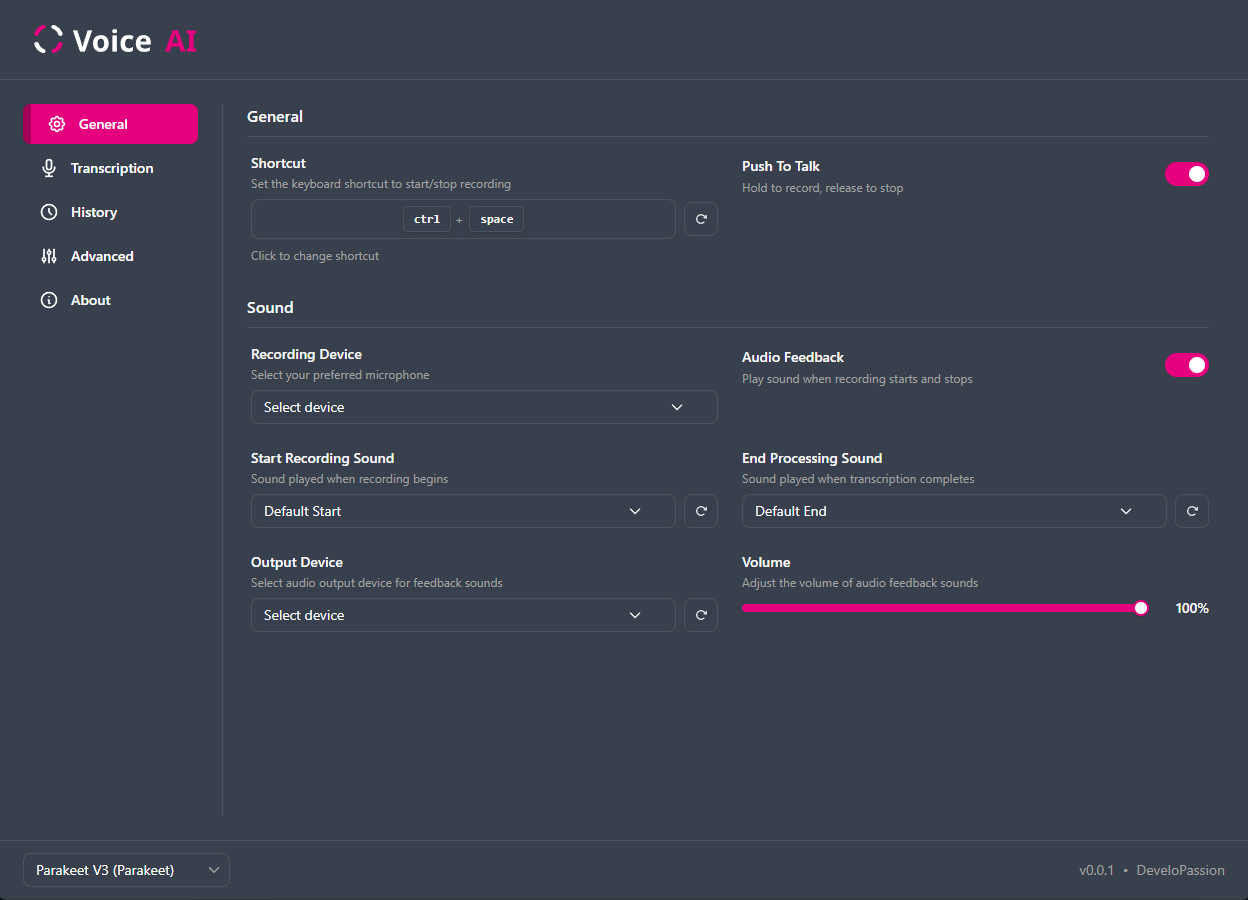
Step 4: Customize Settings
Personalize Knowii Voice AI to your preferences:
- Right-click the system tray icon and select "Settings..." to show the main window
- Go to the General tab to customize the recording shortcut, to enable/disable the Push To Talk mode (it is enabled by default)
- Go to the Transcription tab to download/activate additional models, configure the language, etc
- Go to the Advanced tab to configure advanced settings to customize the application, the overlay position, etc
Tips:
- You can click on the model dropdown in the bottom left corner to activate another model or unload the currently active model (freeing up memory)

- You can press Ctrl+Shift+D to show/hide the Debug tab (see Debug Settings for advanced troubleshooting options)
Step 5: Try Advanced Features
Word Replacement
Automatically correct or replace words:
- Go to Settings > Transcription > Custom Words
- Add custom replacements (e.g., "umm" → "" to remove filler words)
- Save and test with a recording
Note: This is an early feature.
Language Selection
- Go to Settings > Transcription
- Select your preferred language
- Try recording in that language
Next Steps
Congratulations! You now know the basics of Knowii Voice AI.
Continue Learning
- Read the Basic Usage guide for more details and tips for best results
- Check the FAQ for common questions
Need Help?
If you encounter any issues, check out the Support page for all available help options including email support, community forums, and GitHub issues.